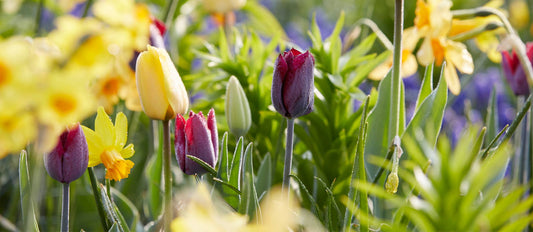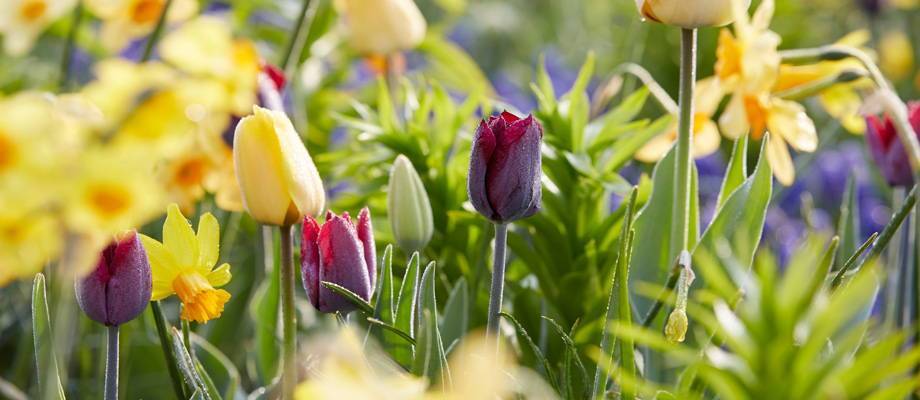
What do you do with a bulb once it finishes flowering? Once flowering is over, all bulbs start the process of storing nutrients for new foliage the following year. That’s why you see all the tulips, for example, ‘topped’ in the bulb fields. This means the flowers are removed early on, allowing the bulbs to absorb the nutrients and prevent seeds developing.
Caring for bulbs in your garden
When caring for bulbs it’s important to just let the leaves on flowering bulbs like tulips, daffodils and hyacinths, die back naturally because the leaves perform an essential function. They transform elements such as oxygen, nitrogen and phosphorous into food. These nutrients are necessary to the bulbs so it can grow and flourish again next year. Once all the stems and leaves are completely yellow and dried up you can cut them off. Deadhead the plants by removing faded blooms so don’t waste energy producing seeds.
Naturalising bulbs
Fertilising bulbs in your garden
Although bulbs do store nutrients efficiently, for the best results you can give them a helping hand at planting time. Bulbs that remain planted for several years will also need some extra fertiliser from time to time. You could use a natural home-made compost (well-rotted manure), or dried fertiliser pellets or a chemical fertiliser. The latter is fertiliser with a balanced addition of nitrogen, phosphorus and potassium. Fertilisers come in granular and liquid form. Granular fertilisers comprise of tiny particles that don’t dissolve as quickly in the soil, making them ideal fertilisers for when first planting. Liquid fertilisers are best used when the bulbs are established.
Digging up and storing bulbs
An important part of caring for bulbs is storing them over the winter. As soon as the plants have finished flowering, you can deadhead them (snip them off). This prevents the bulbs from putting energy into seed heads and therefore all energy will nourish the actual bulb. If you then add some extra fertiliser too, you will get extra strong and healthy bulbs. Summer is the dormant period for spring bulbs.
- Digging up bulbs
Once all the foliage has withered entirely, you can dig up the bulbs. Some bulbs will benefit from digging to divide the bulbs and prevent overcrowding (normally every three years or so). This is sometimes called transplanting as the divided bulbs are found a new home. Once they’re all dug up, it’s a good idea to knock off excess soil and then allow time for them to dry out; otherwise they are likely to rot. Don’t wash them though. Inspect your bulbs for any sign of disease and only keep firm, healthy bulbs.
- Storing bulbs
All the bulbs you dig up, plus the little offshoot* bulbs you see, are best stored in a cardboard box, a thick paper bag or a crate. Lay them wherever you store them, in layers, with newspaper in between each layer so that air can circulate. Try not to keep bulbs more than three layers deep. Remember to store all your boxes and bags of bulbs in a dry, cool spot and keep humidity levels as low as possible.
*Offshoot bulbs
Bulbs multiply via tiny little offshoots on the base of the bulb. When you dig them up, these can be removed. Old bulb skins and the roots too, once dry, can be removed - this is called peeling the bulbs. The offshoot bulbs can be stored just like the mature bulbs. After storing, plant them up and after a couple of years they are sure to flower too.
Replanting or transplanting bulbs
Spring flowering bulbs can be replanted into the garden (or pots) in autumn. Summer flowering bulbs can be replanted in spring. Tip: plant bulbs in a different spot from the previous year. If you use the same spot, they could become undernourished. Non-cultivar bulbous plants can naturalise so they may remain in the same spot. Most crocus and daffodil bulbs are considered to be non-cultivar bulbous plants.
- Prepare the soil in the new bed or pot.
- Be sure to plant your bulbs deep enough to ensure they won’t show if soil levels drop. A bulb should be planted 2 or 3 times as deep as the bulb’s diameter. For example, a 5 cm bulb should be at least 10cm deep.
- If you desire a naturalised look, for the best effect, scatter the bulbs in groups over your garden.
- With little tiny bulbs, it isn’t important if you position the bulb up or down during planting, but larger bulbs have a definite top (the point) and bottom (roots). The roots need to be planted downwards.
- Watering is very important for developing the root systems of your bulbs. Keep an eye on the moisture level of the soil where you’ve planted the bulbs. If it doesn’t rain within a couple days after planting, you will need to water them.